 Save Pin
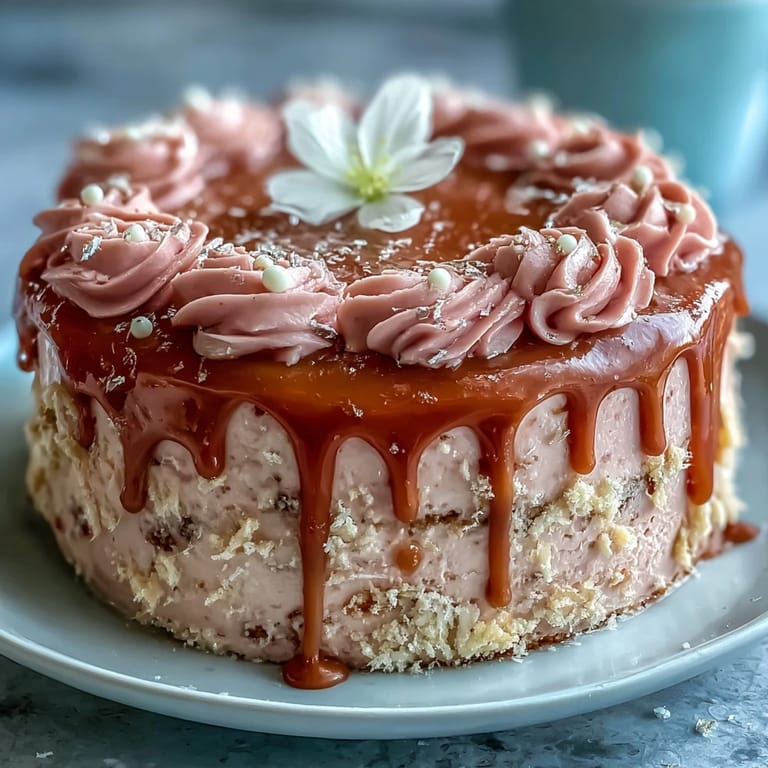
 There was a late spring afternoon when the gentle chatter of bridesmaids prepping decorations filled my kitchen, and the scent of freshly baked cake drifted through the open window. That's when I first attempted this Rosé Velvet Cake, choosing it more for its celebratory blush than for any baking bravado. As the gold drip sparkled in the late sunlight, I remember wondering if elegance could really be captured in dessert form. Butter smeared across my elbow and a nervous laugh from the bride-to-be made the effort somehow more magical. This isn&apost your everyday cake—but neither are the moments that call for it.
I still grin thinking about my scatterbrained rush to find a food-safe paintbrush while my sister-in-law tried to fend off impromptu taste testers with a spatula. Decorating the cake became a clumsy team sport, everyone fussing over the drip and plotting who&apost;d get the first slice—no matter how old we get, the frosting always draws a crowd.
Ingredients
- All-purpose flour: Gives the cake its tender structure; weigh it if you can for super even layers.
- Granulated sugar: This isn&apost; just sweetness—creaming it with butter is what makes the cake so fluffily light.
- Baking soda & baking powder: Classic cake risers; check the expiration date for best lift.
- Salt: Just a pinch sharpens all the other flavors.
- Unsweetened cocoa powder: Only a hint — it&apost;s the secret behind that pink velvet richness, not chocolate flavor.
- Unsalted butter: Room temp is key for seamless mixing, and I always splurge on the good stuff for cakes like these.
- Buttermilk: Adds lushness and a gentle tang; let it warm up at room temp before using.
- Rosé wine: Use one you like to drink—its flavor really does shine through.
- Large eggs: Add richness and help the cake set; crack them into a cup first in case of shell surprises.
- Vanilla extract: Deepens the flavor; I savor the vanilla scent every single time I add it.
- White vinegar: Essential for velvet texture; it reacts with the baking soda to keep everything feather-light.
- Pink food coloring gel: Go slow and build up; too much and you lose that natural blush.
- Cream cheese: Should be as soft as possible for that dreamy, sweepable frosting.
- Powdered sugar: Sifted for frostings that spread without lumps or tears.
- Heavy cream: The gold drip&apost;s base; only a couple of spoonfuls turns chocolate perfectly pourable.
- White chocolate chips: Melt smooth and carry the gold color beautifully.
- Edible gold luster dust: True showstopper material; a little goes a long way.
- Vodka or clear extract: Mixes with the gold so you can shimmer up that drip without dissolving the chocolate.
- Optional flourishes (edible flowers, berries, etc.): Scatter them on top for a final party dress-up moment just before serving.
Tired of Takeout? 🥡
Get 10 meals you can make faster than delivery arrives. Seriously.
One email. No spam. Unsubscribe anytime.
Instructions
- Prep the pans:
- Grease and line three 8-inch cake pans with parchment, pressing it into the corners for easy release and perfect layers.
- Mix dry ingredients:
- Sift together flour, cocoa, baking soda, baking powder, and salt – a quick whisk whips lumps out and your kitchen starts to smell like bakery comfort.
- Cream butter and sugar:
- On medium-high, beat them together until pale and pillowy — the moment it looks almost like whipped cream, you know it&apost;s right.
- Add eggs and flavor:
- Blend in eggs one at a time, mixing until just incorporated and watching the glossy batter swirl; stir in vanilla for that extra warmth.
- Combine liquids and build batter:
- In goes the buttermilk, rosé, and vinegar, followed by alternating in the dry ingredients, mixing until everything is just shy of combined – overmixing is the enemy of velvet.
- Get that perfect blush:
- Fold in pink gel bit by bit; the color deepens after baking, so keep an eye on your batter and stop once you reach a soft blush.
- Bake the cakes:
- Divide batter between pans, smoothing the tops, and slide them into the oven for 30–35 minutes. The house fills with a scent that&apost;s both earthy (from the wine) and sweet.
- Cool the layers:
- Let cakes sit in pans for 10 minutes, then tip out gently onto a wire rack; patience is key or you risk cracks from impatience.
- Make the frosting:
- Beat room-temp butter and cream cheese to creamy glory, then sift in the powdered sugar. Add rosé, vanilla, and salt and keep beating until it&apost;s an irresistible pale cloud.
- Frost and stack:
- If needed, level cooled cakes with a serrated knife, then layer up with frosting. Crumb coat the whole cake and chill, then finish with a lush, final swirl.
- Gold drip magic:
- Melt white chocolate and cream together until silky, let cool, then drizzle around the cake edge for dramatic gold-ready drips.
- Paint the finish:
- Mix gold luster with vodka for edible paint, then gently brush onto the solidified chocolate drips for instant glam.
- Chill and serve:
- Let the finished cake chill at least 30 minutes before slicing, for the neatest, prettiest pieces at the table.
 Save Pin
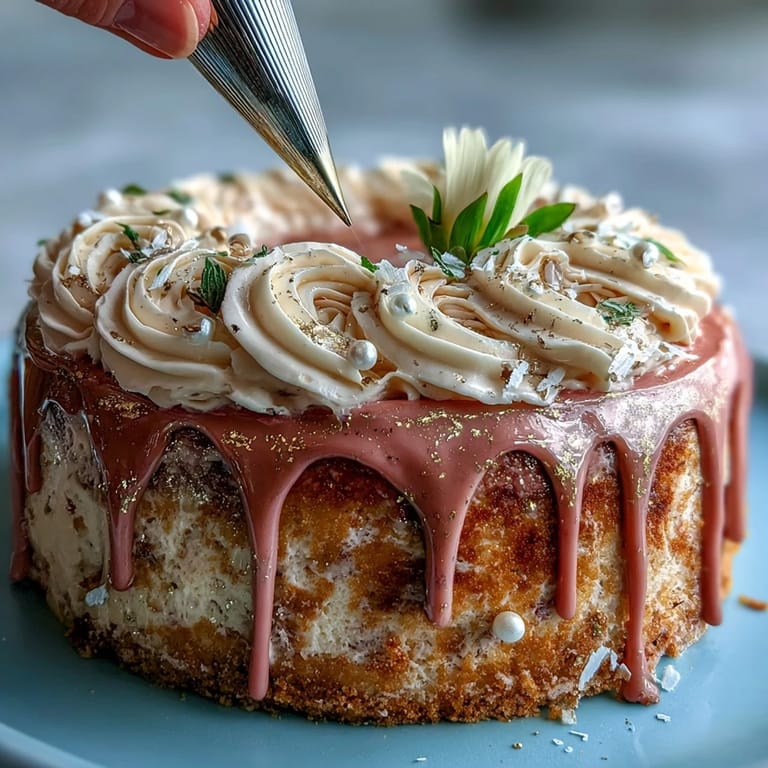
 The moment the bride gasped when she saw her cake — hand-painted gold gleaming and berries tucked just so — I realized the day wasn&apost; about baking perfection, but celebrating with people and a cake that felt as special as the reason for gathering.
How To Get That Picture-Perfect Gold Drip
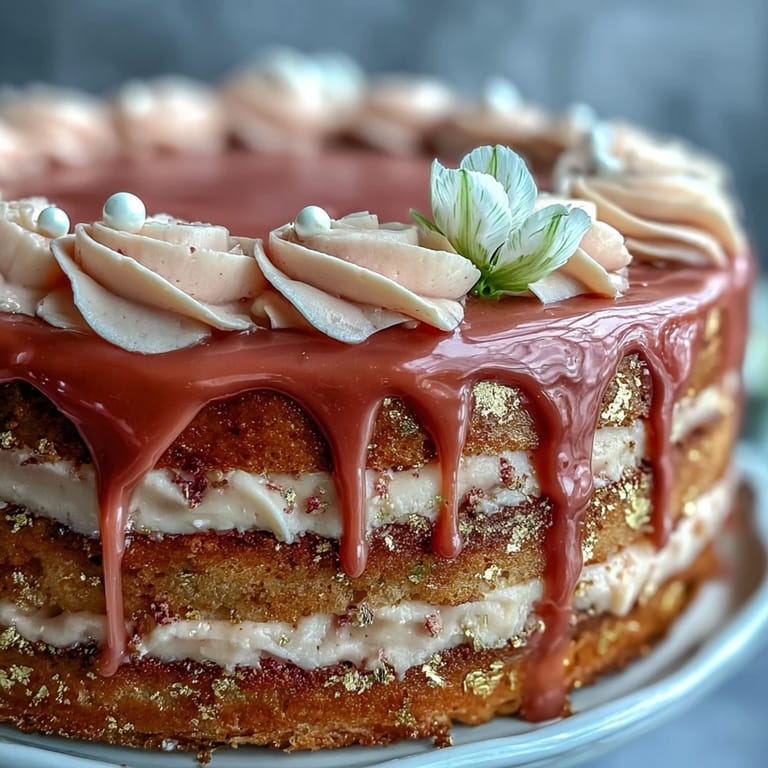
The secret to a flawless drip is patience: let that melted chocolate cool just until it&apost;s still pourable but not hot, and the drips will hug the cake instead of running all the way down. Brushing on the gold is oddly soothing, and every little uneven brushstroke just adds to the charm. If you ever feel nervous, remember, even lopsided drips taste amazing.
Choosing Your Rosé For Baking
Rosé isn&apost; just about pink color—dry or semi-sweet varieties bring out natural fruit notes in the cake. If you don&apost;t want to bake with alcohol, sparkling grape juice or pink lemonade create a lovely substitute with their crisp, lively finish. Use something you like to sip—the taste does linger in the final crumb.
Letting Everyone Join The Fun
Hand out extra edible flowers or a tray of fresh berries, and let your guests scatter their own cake toppings. It turns the final flourish into a memory everyone gets to share.
- Add extra gold leaf for drama.
- Serve with a little bowl of leftover frosting for dipping.
- Don&apost; t forget a sharp serrated knife for clean slices!
 Save Pin
 May your celebrations be as unforgettable as this cake is gorgeous—and may your kitchen always be this full of laughter and golden crumbs.
Recipe Questions & Answers
- → How can I boost the rosé flavor without adding more liquid?
Reduce other liquid slightly and brush layers with a concentrated rosé soak; alternatively simmer a small amount of rosé with sugar to create a syrup and brush on cooled layers for pronounced wine notes without thinning the batter.
- → What's the best way to achieve a smooth crumb coat?
Use chilled layers and apply a thin layer of frosting, smoothing with an offset spatula. Chill until firm (about 20–30 minutes), then apply the final coat for a clean finish and sharp edges.
- → How do I make a stable white chocolate drip?
Gently melt white chocolate with warm cream in short bursts, stir until fully smooth, then cool slightly so it thickens before dripping. Test drip consistency on the bowl edge to ensure it holds shape on the cake edge.
- → Can I make a non-alcoholic version that keeps the rosé character?
Swap rosé for concentrated sparkling grape juice or reduce rosé with sugar into a syrup and replace with the same volume of grape juice reduction to maintain bright, fruity notes without alcohol.
- → How should I store and serve the finished cake?
Keep the cake refrigerated for up to 3 days, covered to avoid drying. Let slices sit at room temperature 20–30 minutes before serving to mellow the chill and bring out the rosé and cream cheese flavors.
- → Any tips for painting the edible gold onto the drip?
Mix gold luster dust with a small amount of clear alcohol or clear extract to a paintable consistency. Brush gently onto a fully set white chocolate drip in thin layers, allowing each pass to dry to avoid streaks.