 Save Pin
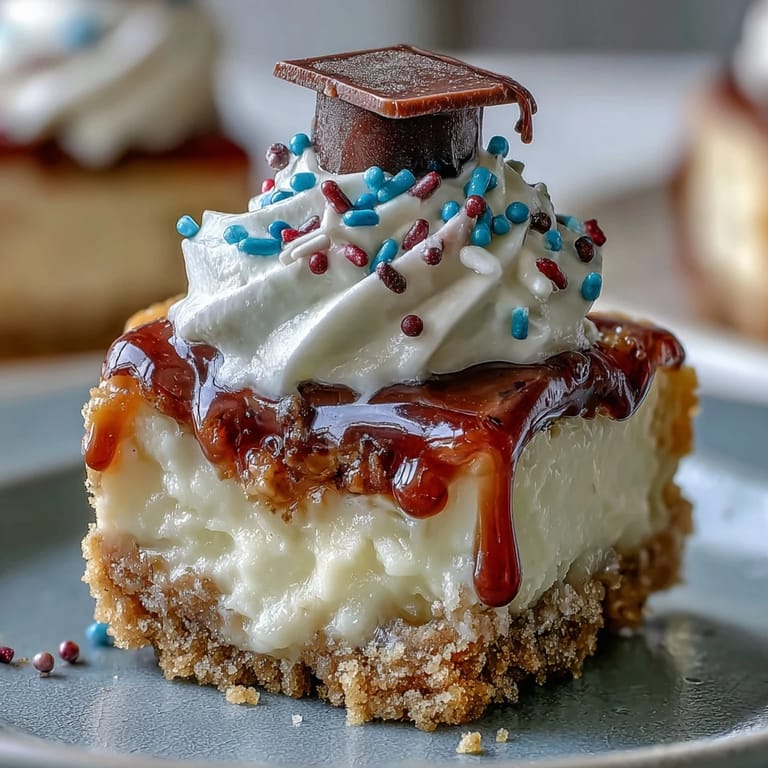
 Some afternoons, the kitchen turns into a makeshift celebration zone, and that was certainly the case the first time I made these cheesecake bites for my cousin's graduation. The air smelled like toasted graham crackers and there was an undertone of nervous laughter as we prepped the toppings. There’s something very lively about swirling cream cheese just as upbeat music plays in the background. Everyone’s hands were sticky with sugar and the sound of spoons clinking in bowls felt like a small symphony dedicated to the graduate. Crispy crusts, creamy centers, and haphazard sprinkles were the result of our impromptu party prep.
Making these for my friend's college sendoff surprised me—everyone, even those who claimed not to love cheesecake, hovered around the tray as soon as I opened the fridge. In between hanging banners and sharing cheesy inside jokes, we squeezed whipped cream onto each bite in record time. The messier our hands got, the more it felt like the perfect pre-celebration ritual. Someone always tries to sneak a taste before the party starts. With each batch I make, I add a different twist—sometimes it’s rainbow sprinkles, other times it’s berries plucked straight from the garden.
Ingredients
- Graham cracker crumbs: I’ve found that pulsing full crackers in a food processor gives a fresher taste, but pre-crushed works in a pinch for speed.
- Granulated sugar: Essential for both the crust and the filling—it gives the bites their signature gentle sweetness and just a smidge of caramelization on the bottom.
- Unsalted butter, melted: Melted butter binds the crust perfectly; don’t skip letting it cool a bit before mixing or your crust can get greasy.
- Cream cheese, softened: The star—bringing it to room temperature means a smoother, lump-free filling every time.
- Eggs: Adding eggs one at a time ensures the filling is silky and not overbeaten.
- Pure vanilla extract: Adds lovely warmth—real extract absolutely matters.
- Sour cream: A bit of tang balances all the sweetness and makes the filling extra plush.
- Salt: Just a pinch brings out all the subtle flavors you’d otherwise miss.
- Whipped cream: For topping—store-bought or homemade both add a nice, creamy flourish.
- Festive sprinkles or mini chocolate graduation caps: Customize to fit the party, but honestly, even basic sprinkles make these festive.
- Fresh berries: My favorite add-on—blueberries or raspberries make each bite pop.
Tired of Takeout? 🥡
Get 10 meals you can make faster than delivery arrives. Seriously.
One email. No spam. Unsubscribe anytime.
Instructions
- Get Ready:
- Preheat your oven to 325°F and line up those tiny muffin cups; liners make removal a breeze later.
- Mix The Crust:
- Toss together the graham cracker crumbs, sugar, and melted butter with your fingertips until it feels like damp sand, then spoon a tablespoon into each liner and press firmly—there’s a satisfying crunch as you flatten them.
- Bake The Base:
- Slide the pan into the oven for about 5 minutes, just until fragrant, then let them chill out on the counter while you make the filling.
- Prepare The Filling:
- Beat your softened cream cheese until it surrenders every last lump, then add sugar, eggs (one at a time), vanilla, sour cream, and salt—watch for that glossy, thick swirl as you mix.
- Fill & Bake:
- Scoop the creamy batter into each cup nearly to the top and bake for 13–15 minutes; they should jiggle just slightly in the center when ready.
- Cool Down:
- Let the bites rest in the pan for 10 minutes before transferring to a wire rack—if you can resist, let them cool to room temp, then chill for half an hour for the ultimate creamy texture.
- Finish With Flair:
- Right before serving, bring out the whipped cream and decorations; pop on your cutest sprinkles, chocolate “caps,” or berries for an irresistibly fun look.
 Save Pin
  Save Pin
 The first bite at the party got a round of delighted 'mmms' and someone shouted that they tasted just like something from a fancy bakery. Suddenly, everyone wanted to know the secret—even my uncle, famous for never asking about recipes, cornered me in the kitchen for details. It was such a tiny dessert, but it made the celebration feel bigger. These cheesecake bites have become a staple for every milestone since, party or no party.
Best Times to Make Cheesecake Bites
I find these are perfect not only for graduations, but also whenever you need a make-ahead treat—bridal showers, birthdays, even midnight snacks with friends. There’s freedom in making them early and just adding toppings at the last minute for a fresh, lively finish. No need to stress about last-minute dessert disasters when you have a batch ready in your fridge.
Swapping Things Up
Experimenting has led to some happy accidents, like when I ran out of graham crackers and used chocolate cookies—instant hit. Lemon zest in the filling is my latest favorite little spark of flavor, and using gluten-free cookies lets my whole crew join in. The tiny size makes it easy to test new versions without committing the whole batch.
Decorating Made Simple
Turning these into mini graduation caps is a step worth taking—the kids at our last gathering giggled the whole time while crafting tiny tassels from licorice. I stick with two toppings maximum for parties to avoid chaos. Homemade whipped cream pipes out quickly and holds up much better than canned if you prep ahead.
- Prep all toppings before you start assembling.
- Try using a zip-top bag for easy piping if you don’t have a pastry tip.
- Don’t stress about perfection—uneven sprinkles and squiggly “caps” just add to the fun.
 Save Pin
  Save Pin
 Every time I make these, the kitchen fills with excited voices and gleaming eyes—just the way celebrations should start. I hope these cheesecake bites make your festivities feel extra joyful and just a bit more delicious.
Recipe Questions & Answers
- → How do I prevent the filling from cracking?
Avoid overmixing and bake until the centers are just set with a slight jiggle. Let bites cool in the pan before chilling to reduce sudden temperature changes that cause cracks.
- → Can these be made ahead of time?
Yes. Bake and chill the bites up to a day ahead, then add whipped cream and decorations just before serving to keep toppings fresh.
- → How can I make a gluten-free version?
Substitute graham crumbs with certified gluten-free cookie crumbs and confirm all other ingredients are labeled gluten-free.
- → What yields the smoothest filling?
Bring cream cheese to room temperature and beat until fully smooth before adding sugar and eggs. Mix just until combined after adding eggs to avoid incorporating excess air.
- → Can these be frozen?
Yes. Freeze cooled, unfrosted bites on a tray, then transfer to an airtight container. Thaw in the refrigerator and add whipped toppings just before serving.
- → What are quick decorating ideas for graduation?
Top with a dollop of whipped cream, fresh berries, festive sprinkles, or small chocolate squares and licorice string fashioned into mini caps for a celebratory look.