 Save Pin
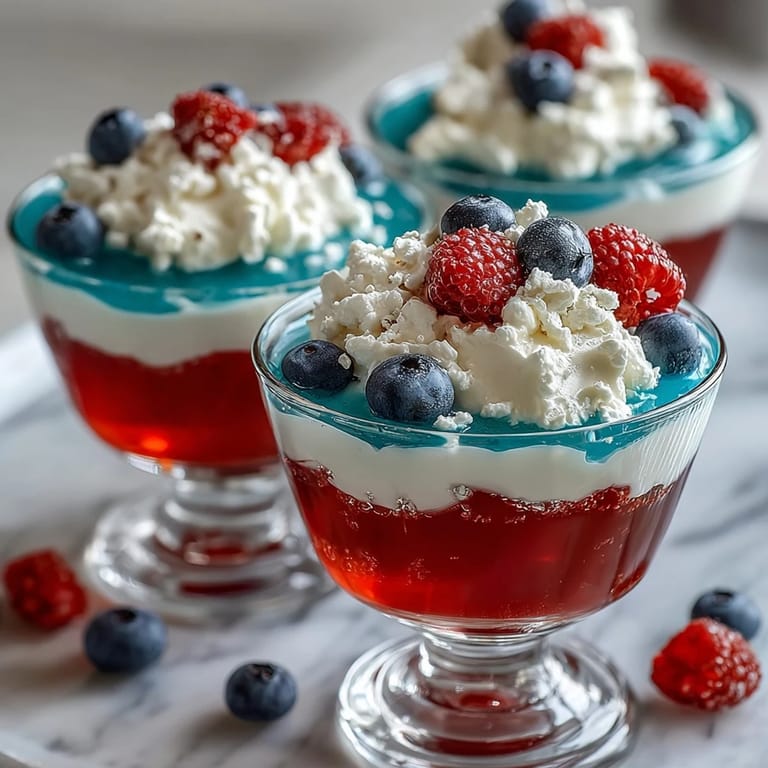
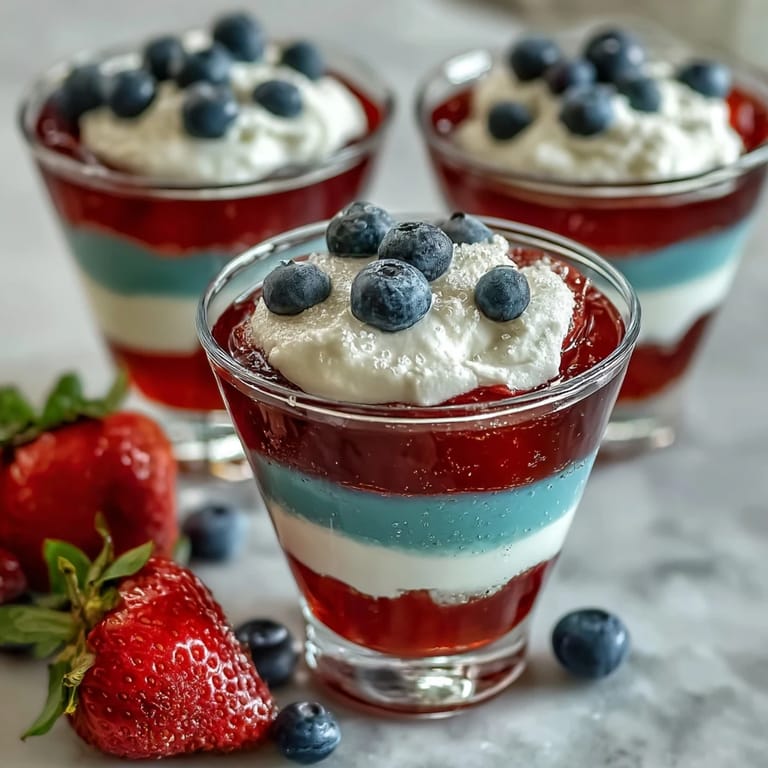
 My daughter came home from school one July afternoon with a mission: she wanted to make something patriotic for the neighborhood block party, but it had to be impressive enough that her friends would actually want seconds. We stood in the kitchen staring at ingredients when she spotted a box of blue Jello and suddenly her eyes lit up with this vision of red, white, and blue stripes. What started as a simple summer dessert became this whole adventure in patience and layering, teaching us both that good things really do take time to set properly.
That block party was almost too hot to enjoy dessert, but watching kids queue up for these cups made it worth every minute we spent tilting them in that muffin tin. One neighbor actually asked for the recipe written down, which felt like the highest compliment we could have received for something so simple yet somehow perfect.
Ingredients
- Strawberry or cherry flavored Jello (3 oz box): The red layer's backbone, and choosing between flavors lets you customize the taste to match your mood.
- Boiling water: Essential for dissolving the Jello completely, no grainy texture allowed here.
- Cold water: Brings the temperature down just enough to prevent melting the layer below when you pour.
- Unflavored gelatin (1 envelope): The secret to that silky white middle layer that holds everything together.
- Sweetened condensed milk: Creates that creamy, luscious texture that makes the white layer so luxurious and totally different from regular Jello.
- Blue raspberry flavored Jello (3 oz box): The finishing layer that brings the patriotic color scheme full circle.
- Whipped cream and fresh berries (optional): These elevate the presentation from cute to genuinely showstopping right before serving.
Tired of Takeout? 🥡
Get 10 meals you can make faster than delivery arrives. Seriously.
One email. No spam. Unsubscribe anytime.
Instructions
- Set up your cups like you mean it:
- Grab eight clear cups and arrange them where they'll stay undisturbed for a while. If you're using a muffin tin to tilt them for the first layer, get that ready now.
- Make the red layer happen:
- Dissolve the strawberry Jello in one cup of boiling water, watching as it goes from granules to liquid almost instantly. Stir in the cold water, then divide it evenly among your cups, tilting them at an angle in the muffin tin and letting them chill for 45 to 60 minutes until they feel completely set when you touch the surface.
- Bloom and build the white layer:
- Sprinkle the unflavored gelatin over cold water and let it sit for five minutes—this blooming step matters more than you'd think. Pour boiling water over it and stir until every granule dissolves, then whisk in the sweetened condensed milk until it's smooth and creamy, then let it cool to room temperature so it doesn't compromise your red layer.
- Layer two goes down with care:
- Once your red is fully set, pour the white mixture slowly and deliberately over each cup, keeping the temperature cool enough that it won't melt what's below. Set the cups upright now and refrigerate for another 45 to 60 minutes until the white layer feels firm to the touch.
- Finish with blue confidence:
- Dissolve the blue Jello in boiling water the same way you did the red, add cold water, and let it cool completely. Pour it gently over the white layer, then refrigerate everything upright for at least two hours, though overnight is even better if you have the time.
- Top and serve with flourish:
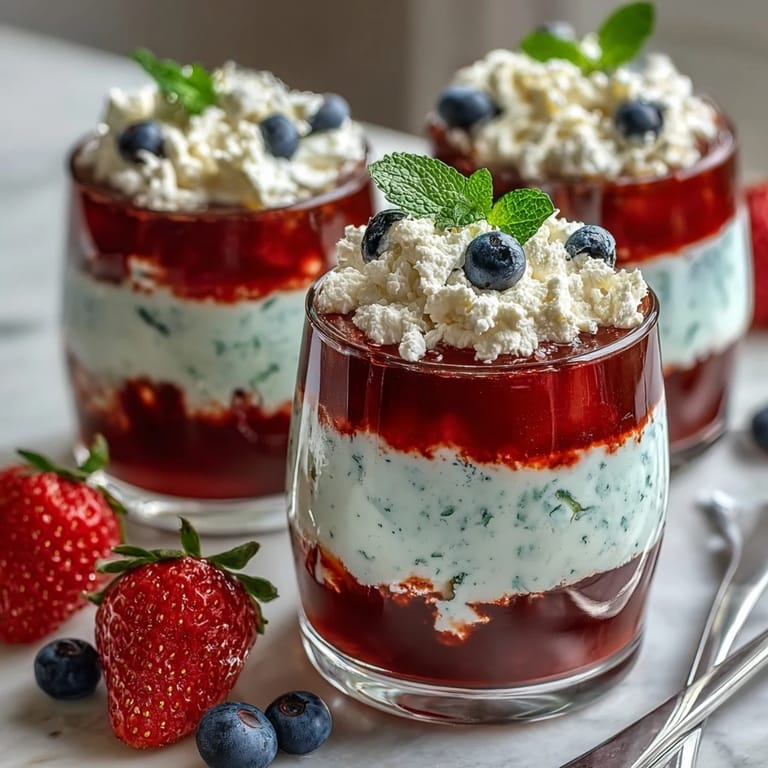
- Right before people arrive, crown each cup with a dollop of whipped cream and scatter some fresh berries on top if you're feeling fancy, which honestly you should.
 Save Pin
 The most magical moment came when my daughter walked these cups into that block party and set them on the dessert table, watching people's faces light up as they realized these were homemade. It was silly, really, that something so simple made her feel proud enough to stand there and watch people enjoy them.
The Layering Magic
There's something almost meditative about pouring each layer and watching it settle into place. The key is keeping everything cool enough to stack without mixing, which means patience between layers becomes part of the cooking process itself. Some people skip this and just throw everything in a bowl, but that's when you lose the whole point—those distinct, beautiful stripes are what make these special.
Flavor Combinations That Work
While red, white, and blue is the classic, you're not locked into it. Lime green, white, and orange creates a fun tropical vibe, and cherry, white, and grape gives you a different patriotic feel. The white layer stays constant because it's the unifying middle that makes the contrast work, but those fruit flavors are genuinely flexible based on what you can find or what you're craving.
Making Ahead and Storing
These cups actually improve when you make them a day or two ahead, as the flavors meld and the texture becomes even more set. Cover them loosely with plastic wrap in the refrigerator so they don't pick up other flavors, and they'll keep perfectly for up to three days. When you're ready to serve, add the whipped cream and berries fresh rather than ahead of time, since they'll stay crispier and the presentation stays picture-perfect longer.
- Dairy-free version uses coconut milk and sugar mixed together to replace the sweetened condensed milk.
- Make sure your cups are truly clear glass or plastic so those layers actually show off.
- If someone has a gelatin allergy, there are plant-based gelatin alternatives that work exactly the same way.
 Save Pin
 These cups prove that dessert doesn't need to be complicated to be memorable. When you nail the layers and watch people react to something you made with your own hands, that's when food becomes more than fuel.
Recipe Questions & Answers
- → How do I achieve sharp distinct layers?
Allow each gelatin layer to fully set in the refrigerator before adding the next to maintain clear, sharp layers.
- → Can I substitute the condensed milk in the white layer?
Yes, for a dairy-free option, replace sweetened condensed milk with coconut milk and sugar to maintain creaminess.
- → What is the best way to chill the cups at an angle?
Place cups in a muffin tin tilted slightly to create angled layers and let them chill in the refrigerator until set.
- → Which berry flavors work best for the red and blue layers?
Strawberry or cherry flavors work well for the red layer, while blue raspberry is recommended for the blue layer. You may swap flavors to suit your taste.
- → How long should the chilling time be for the entire dessert?
The total chilling time is about 4 hours and 30 minutes, allowing each layer to set properly before proceeding.
- → Are these layered cups gluten-free?
Yes, the ingredients are gluten-free, but always check labels especially for gelatin and condensed milk to avoid hidden gluten.